Chapter 1 — Introduction
Imagine your boss sends you a message.
“The web server is down.”
You log into the Linux server.
Somewhere inside this system is the configuration file responsible for the problem.
But there’s a problem.
You don’t know where the file is.
You don’t know which program is running.
You don’t know what type of file you’re looking at.
You don’t know when it was modified.
And you don’t even know the full path.
This is where Linux file discovery commands become essential.
Navigation commands help us move through the file system.
Discovery commands help us find, identify, and investigate files.
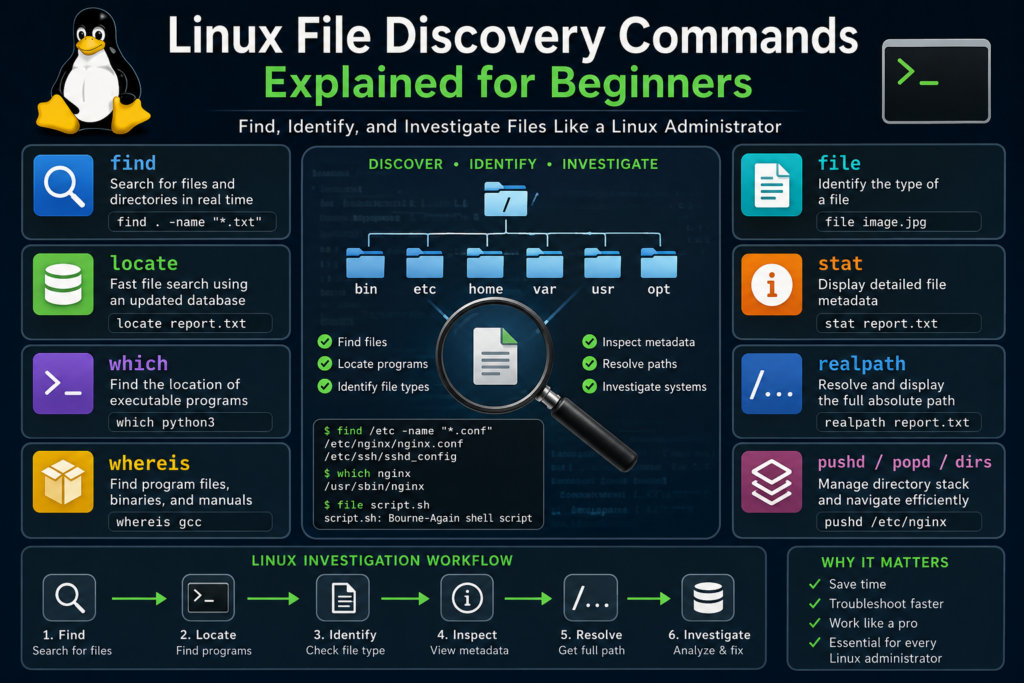
In this lesson, we’ll learn the tools Linux administrators use every day to search for files, locate programs, identify unknown files, inspect metadata, and investigate systems efficiently.
Let’s begin.
[IMAGE 1]
Linux Investigation Workflow
Chapter 2 — The Difference Between Navigation and Discovery
In the previous lesson, we learned how to move around the Linux file system.
Commands such as:
pwd
ls
cd
allowed us to navigate directories.
But navigation assumes you already know where something is located.
What happens when you don’t?
Imagine a server containing millions of files.
You know a file exists.
But you don’t know where.
This is the moment when discovery commands become important.
Instead of moving through directories one at a time, Linux can search, investigate, and reveal information automatically.
Think of navigation as driving through a city.
Think of discovery as having a map, GPS, and search engine.
Chapter 3 — Finding Files with find
The most powerful file search command in Linux is find.
The find command searches the file system in real time.
It walks through directories and examines every file it encounters.
To search for a file named report.txt:
find . -name report.txt
The dot means:
Start searching from the current directory.
Linux may return:
./Documents/report.txt
The file has been found.
You can search the entire system:
find / -name report.txt
Because Linux searches every directory, this command may take time on large systems.
You can search by file extension:
find . -name “*.txt”
Search for directories only:
find . -type d
Search for files only:
find . -type f
Searches can become very sophisticated.
For example:
find . -name “*.log”
find . -name “*.conf”
find /etc -name sshd_config
Many Linux administrators use find every day.
Whenever you don’t know where a file is located, find is usually the first tool you reach for.
[TERMINAL DEMO]
find . -name “*.txt”
find /etc -name sshd_config
find . -type d
Chapter 4 — Fast Searching with locate
The find command is powerful.
But it can sometimes be slow.
Why?
Because it examines the filesystem in real time.
Linux provides another tool called locate.
Instead of searching the disk directly, locate searches a database.
Example:
locate report.txt
Results appear almost instantly.
This speed comes from using a prebuilt index.
Think of it like searching a library catalog instead of walking through every shelf.
However, there is a tradeoff.
The database must be updated.
To update it:
sudo updatedb
If the database is outdated, locate may miss recently created files.
This gives us an important rule.
find is slower but always current.
locate is faster but depends on its database.
Professional Linux users use both.
[IMAGE 2]
find
↓
Real-Time Search
↓
Always Accurate
And
locate
↓
Database Search
↓
Very Fast
Chapter 5 — Finding Executables with which
Suppose you type:
python3
Linux somehow knows where Python is located.
How?
The answer is the PATH environment variable.
Linux searches specific directories for executable programs.
To see which executable will run:
which python3
Example output:
/usr/bin/python3
Another example:
which ls
Output:
/usr/bin/ls
This command is extremely useful when multiple versions of software exist on a system.
For example:
which gcc
which docker
which nginx
which java
Whenever you’re unsure which executable Linux will launch, use which.
[TERMINAL DEMO]
which python3
which gcc
which ls
Chapter 6 — Finding Program Files with whereis
The which command shows executable locations.
The whereis command goes further.
Example:
whereis python3
Output:
python3:
/usr/bin/python3
/usr/share/man/man1/python3.1.gz
Notice what happened.
Linux showed:
The executable
The documentation
Related files
This makes whereis useful when exploring installed software.
Examples:
whereis ssh
whereis bash
whereis gcc
whereis nginx
whereis helps administrators understand where software components are stored.
[TERMINAL DEMO]
whereis bash
whereis ssh
whereis gcc
Chapter 7 — Identifying Unknown Files with file
Imagine you discover a mysterious file.
You don’t know what it is.
You don’t know whether it’s text, an image, a script, or a program.
This is where the file command becomes useful.
Example:
file image.jpg
Output:
JPEG image data
Another example:
file script.sh
Output:
Bourne-Again shell script
Another:
file /bin/ls
Output:
ELF 64-bit executable
Unlike Windows, Linux does not rely heavily on file extensions.
Linux examines the contents of the file itself.
This makes file extremely useful when investigating unknown files.
Security professionals and system administrators use this command constantly.
[TERMINAL DEMO]
file image.jpg
file script.sh
file /bin/ls
Chapter 8 — Inspecting File Metadata with stat
Sometimes we need more information than ls can provide.
The stat command displays detailed metadata.
Example:
stat report.txt
The output includes:
File size
Ownership
Permissions
Inode number
Access time
Modification time
Change time
Example:
Size: 2048
Access: 2026-05-20
Modify: 2026-05-21
Change: 2026-05-21
This information is extremely useful when troubleshooting systems.
For example:
Was the file modified recently?
Who owns it?
How large is it?
Has it been accessed?
The stat command answers these questions.
[TERMINAL DEMO]
stat report.txt
Chapter 9 — Resolving Full Paths with realpath
Linux users often work with relative paths.
Sometimes we need the complete absolute path.
The realpath command provides this information.
Example:
realpath report.txt
Output:
/home/gary/Documents/report.txt
Linux converts the path into its absolute form.
This is especially useful when writing scripts or debugging applications.
Whenever you’re unsure of the complete path to a file, realpath can provide the answer instantly.
[TERMINAL DEMO]
realpath report.txt
Chapter 10 — Working Efficiently with pushd and popd
Most Linux users learn cd.
Fewer users learn pushd and popd.
But experienced administrators love them.
Suppose you’re working inside:
/home/gary/projects
You need to temporarily visit:
/etc/nginx
Instead of remembering your original location, type:
pushd /etc/nginx
Linux saves your current location on a directory stack.
Now perform your work.
When finished:
popd
Linux instantly returns to your original location.
Think of it like bookmarking your page in a book.
This feature becomes incredibly useful when moving between multiple locations.
You can view the stack using:
dirs
This displays all saved directory locations.
[TERMINAL DEMO]
pwd
pushd /etc
dirs
popd
pwd
Chapter 11 — A Real Linux Investigation
Let’s combine everything.
Imagine a server issue.
A web application has stopped working.
You begin investigating.
First, locate the configuration file.
find /etc -name “*.conf”
Then determine where the executable resides.
which nginx
Next, locate related files.
whereis nginx
Verify the file type.
file /usr/sbin/nginx
Inspect metadata.
stat /etc/nginx/nginx.conf
Display the complete path.
realpath /etc/nginx/nginx.conf
Notice what happened.
We didn’t simply navigate.
We investigated.
This is exactly how Linux administrators solve problems every day.
Discovery commands transform Linux from a collection of files into a system you can understand.
Chapter 12 — Summary
Today we learned some of the most important Linux discovery commands.
find searches the filesystem.
locate performs fast database searches.
which finds executable programs.
whereis locates program-related files.
file identifies file types.
stat displays metadata.
realpath shows complete paths.
pushd and popd manage directory stacks.
dirs displays saved locations.
Together, these commands allow us to search, identify, inspect, and investigate Linux systems efficiently.
Navigation commands tell us where we are.
Discovery commands tell us what we’re looking at.
Master both, and you’ll be well on your way to thinking like a Linux administrator.
Thank you for watching.
And I’ll see you in the next Linux tutorial.