What is VirtualBox?
Virtual Machine abstracts the hardware of our personal computers such as CPU, disk drives, memory, NIC (Network Interface Card), etc, into many different execution environments as per our requirements, hence giving us a feeling that each execution environment is a single computer. For example, VirtualBox. VirtualBox is a powerful, open-source virtualization software developed by Oracle. It allows you to run multiple operating systems simultaneously on a single physical machine. Each operating system runs in its own virtual environment, providing the ability to test, develop, and run applications in different environments without the need for separate hardware.
Key Features of VirtualBox:
- Cross-Platform Support: Runs on Windows, macOS, Linux, and Solaris hosts.
- Guest OS Support: Supports a wide variety of guest operating systems, including various versions of Windows, Linux, macOS, and others.
- Snapshots: Allows you to save the state of a virtual machine at any point in time and revert back to it.
- Shared Folders: Facilitates easy file sharing between host and guest operating systems.
- Seamless Mode: Integrates applications from the guest operating system directly onto the host desktop.
- Virtual Networking: Supports multiple virtual networking options, including NAT, bridged, and host-only networking.

How to Install VirtualBox on Windows ?
Step 1: Download VirtualBox
- Open your web browser and go to the official VirtualBox website.
- Click on the “Download VirtualBox” link.
- Select the appropriate package for your Windows operating system.
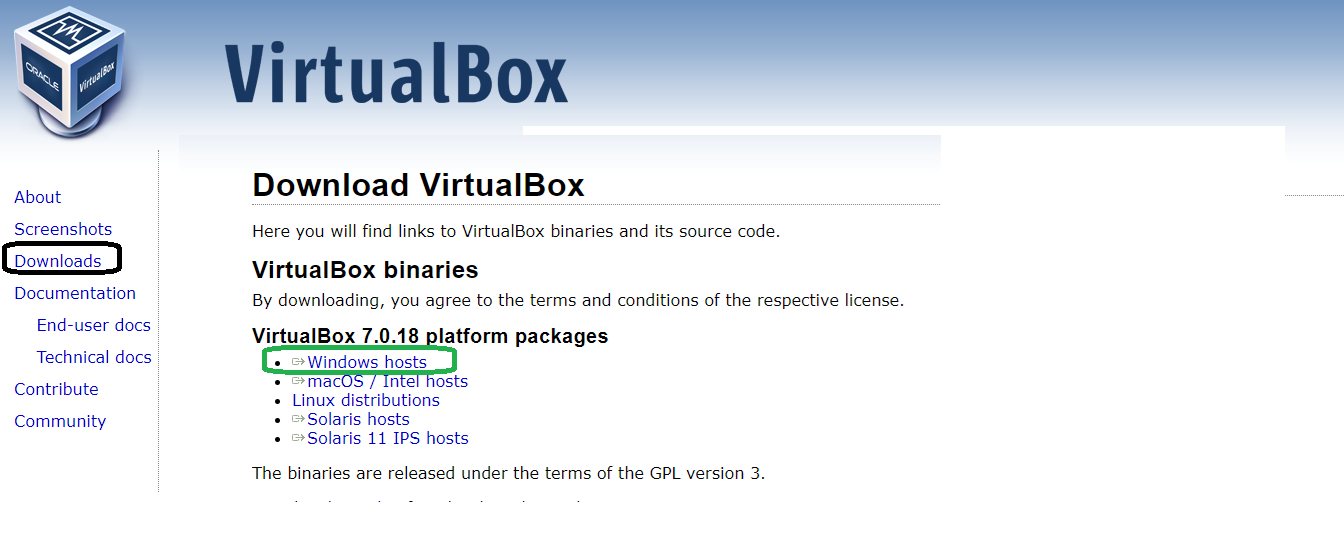
download virtualbox
Step 2: Run the Installer
- Once the download is complete, locate the installer file (usually named something like
VirtualBox-x.x.x-xxxxxx-Win.exe). - Double-click the installer file to run it.
Step 3: Follow the Installation Wizard

Welcome Screen
- Welcome Screen: The installation wizard will open. Click “Next” to proceed.
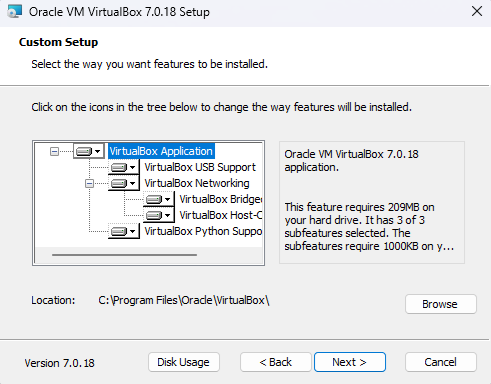
- Custom Setup: Choose the components you want to install. The default settings are usually sufficient. Click “Next” to continue.
- Shortcut Options: Decide if you want to create shortcuts for VirtualBox. Click “Next”.
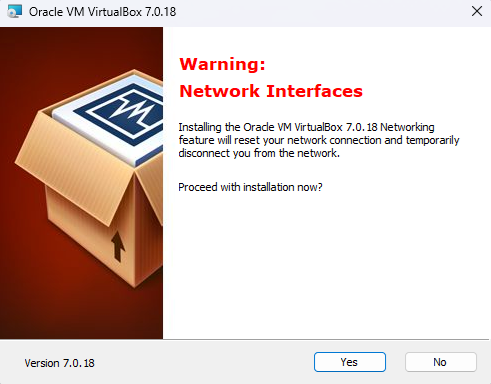
- Network Interfaces: You may receive a warning about network interfaces. VirtualBox needs to install network interfaces to support its virtual networking capabilities. Click “Yes” to proceed.
- Ready to Install: Review your settings and click “Install” to begin the installation process.
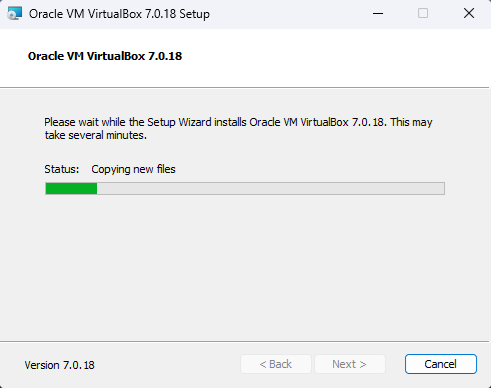
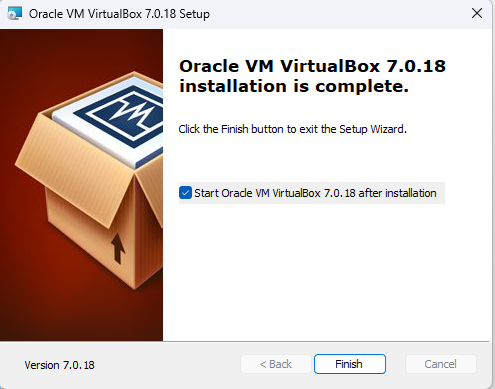
Step 4: Complete the Installation
- Wait for the installation to complete. This may take a few minutes.
- Once the installation is finished, click “Finish” to close the wizard. Optionally, you can choose to start VirtualBox immediately by selecting the “Start Oracle VM VirtualBox after installation” checkbox.
Step 5: Install VirtualBox Extension Pack (Optional)
- Go back to the VirtualBox download page.
- Find the “VirtualBox Extension Pack” section and download the corresponding version of the extension pack.
- Open VirtualBox, go to “File” > “Preferences” > “Extensions”.
- Click on the “Add New Package” icon and select the downloaded extension pack file.
- Follow the prompts to install the extension pack.
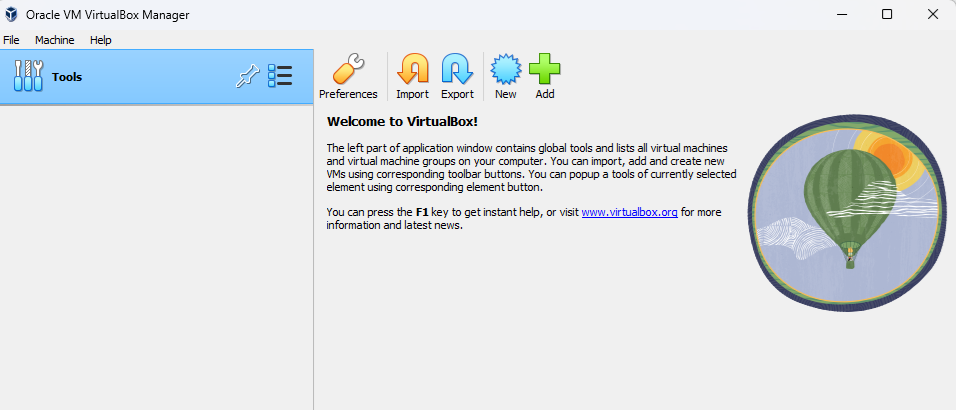
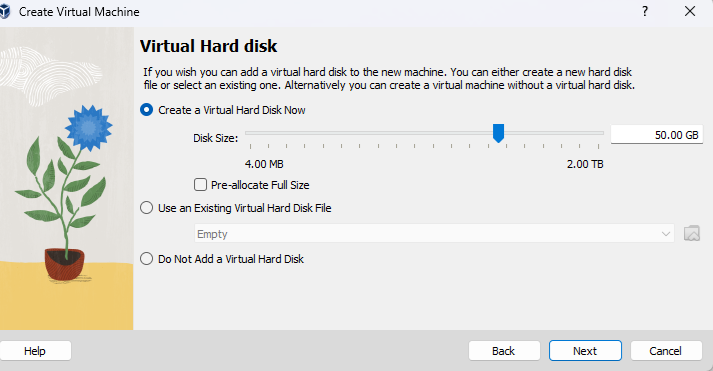
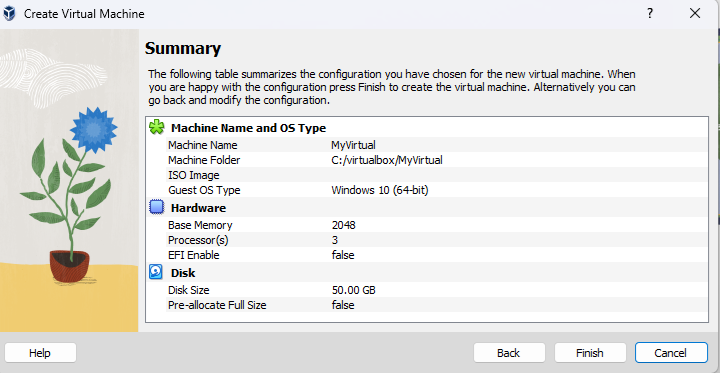
Step 6: Create and Run a Virtual Machine
- Open VirtualBox.
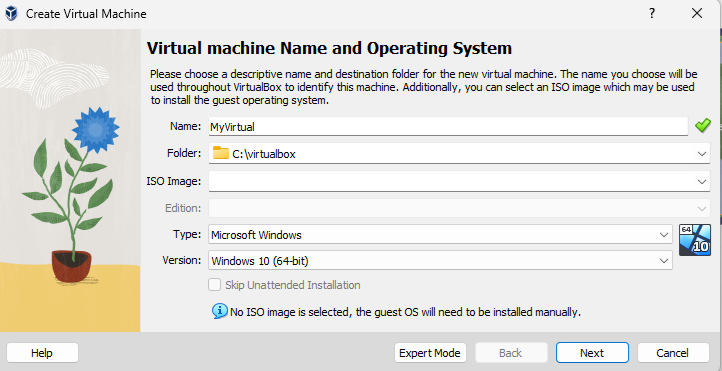
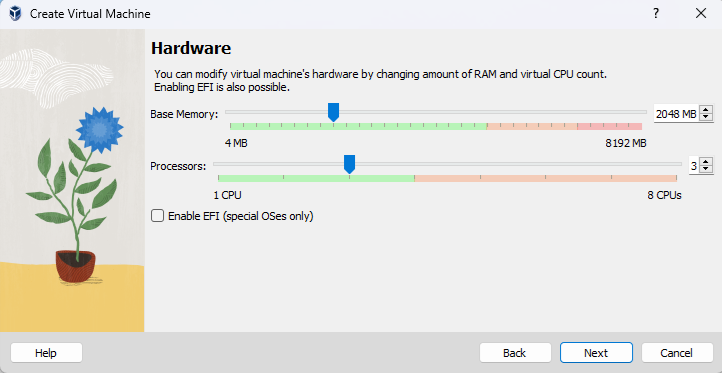
- Click on the “New” button to create a new virtual machine.
- Follow the prompts to configure the virtual machine (e.g., name, type, version, memory size, hard disk).
- After the virtual machine is created, you can start it by selecting it from the list and clicking the “Start” button.
- You will be prompted to select an installation media (e.g., ISO file) for the guest operating system. Choose the appropriate installation media and follow the installation steps for the guest OS.